Introduction
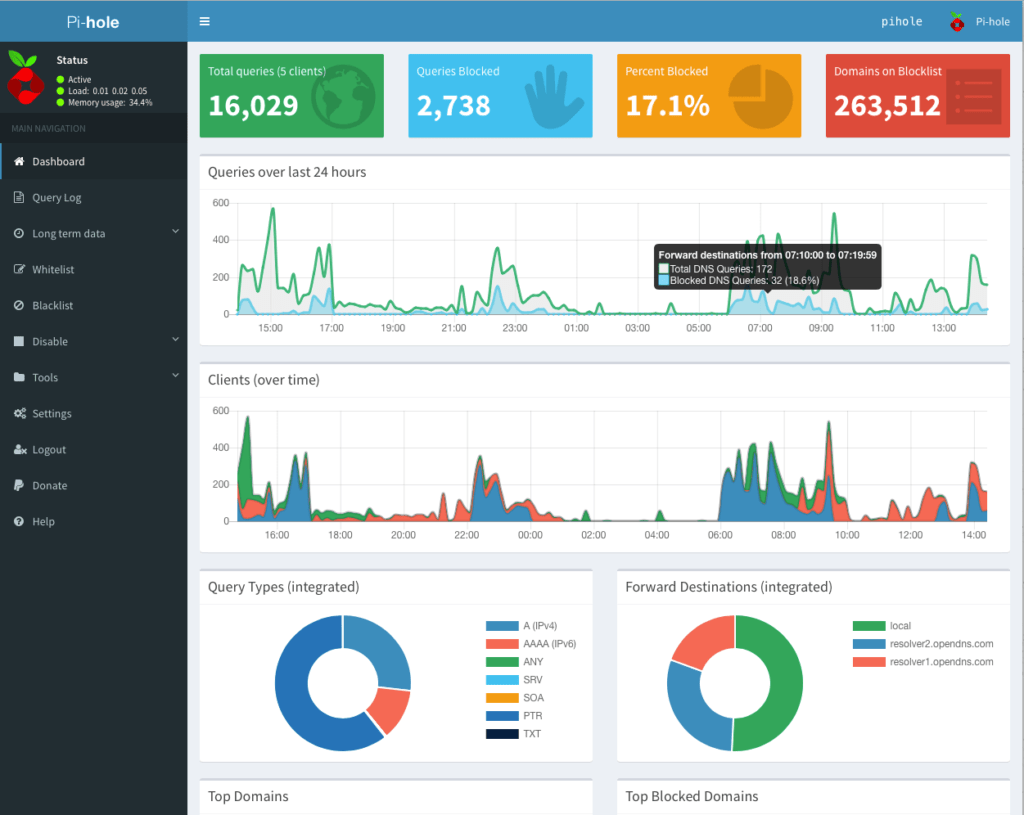
I’ve had the Pi-hole setup for the past month at home. It was a learning experience to see what domains were being called on my network. It also allows you to block malicious domains, and advertising domains, etc. The problem with a lot of the guides on the web is that they are just guides, they don’t explore how to maintain these systems, long term issues, and other things that are only discovered after running the systems for a while.
Before I get into my Pi-Hole experience, lets talk about what it is.
What is a Pi-Hole?
A Pi-Hole is a network dns server, which we have control over. It forwards domain requests that have not been flagged as malicious or advertising to an authoritative DNS server. It flags malicious or advertising domains as such by comparing teh requested domain to a list of malicious and advertising domains, which can be maintained by anybody. This means that this kind of system is reactive and does not proactively block bad connections. Short of some kind of machine learning system it is quite good.
The developers advertise the Pi Hole as a blackhole for internet advertisements, and as you could guess this is hyperbole. Being a dns ad blocker it can only block ads that are from a separate domain to the domain that hosts the content. If the ads are served from the same domain as the content, then it would be unable to block it. This is the case with youtube and if you are looking to block youtube ads on your iPhone, as I was and still am, this is not the solution.

If you want to find out more about the Pi-Hole you can find out more on the official website here: https://pi-hole.net/
Pi-Hole Experience Set Up
There are heaps of set up guides on the internet. The one that I followed was probably this one. It honestly doesn’t matter because it has been battle tested quite well. Unlike this guide I didn’t start with the raspberry pi, I installed the Pi-Hole on my main Ubuntu server. The reason for that was I didn’t have my raspberry pis on hand. The set up process regardless of whether it is on the ubuntu server or on the rpi, the process is the same. Here is the setup code below.
wget -O basic-install.sh https://install.pi-hole.net
sudo bash basic-install.sh
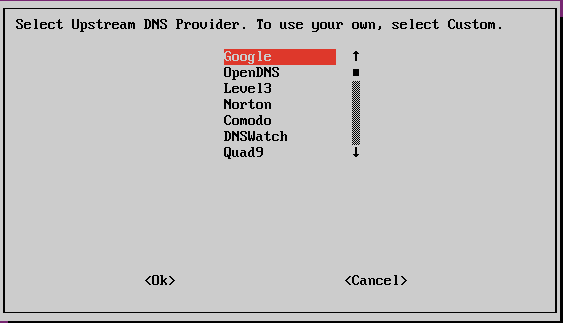
Then click through with the default settings, just remember to make sure that the PiHole will require a static ip address. Also when selecting the authoritative dns servers, choose quad9 if you want to take advantage IBM’s advanced malicious domain detection services. I choose cloudflare and google because its traditionally more reliable than the other services. For me this was temporary because I also set up cloudflared for DNS over https which is a story for another post.

Finally I setup DHCP from the Pi-Hole server which required disabling it on the router. I did this because I wanted to be able to see hostnames. My router doesn’t allow my local network use hostnames, so this is an advantage. Further it allows me to search by hostname rather than an IP Address that changes every 24 hours. This makes the logs useful for some of my other projects.
Pi-Hole Experience
First off, the Pi-Hole has lived up to most of my expectations. It blocks ads where they are served from different domains, and news sites are readable on my phone again. As mentioned, however youtube ads still play on my phone. I have a browser level ad block on my computer to block ads.
The first issue I faced was that my Pi-Hole wouldn’t process DNS requests for certain devices like an iPhone X. I’m still not sure what the issue was that caused this issue. To resolve this I had to override the default dns entry. Overtime I had to override the default settings for a few other devices because of the same issue. I suspect it has something to do with cloudflared which I found out a lot later.
The second major issue occurred when the power shut off. My server doesn’t boot automatically when the power came back on which meant that every device in the house lost internet access. To fix it I had to start up the server and I was thinking what would happen if my server died?
The answer is that I would have no internet until I logged into my router and reset the DHCP server as well as DNS servers. This is especially concerning when I set up the raspberry pi because it is known to corrupt itself when there is an unexpected power outage. Its made worse because the RPi is also the DHCP server which means that I lose a good chunk of my network infrastructure if this happens.
I looked into high availability but this isn’t possible. I also looked at setting up a second Pi-Hole, and this is a viable solution. The only drawback is that I would need to set up a second RPi. If I lose power and it corrupts one device it is likely to corrupt the other one. To resolve this it looks like I have no other option other than to get a UPS. I should also ideally have a separate DHCP server and domain controller.
Conclusion
Two major issues which are a real sticking point for me are unknown failures and RPI failure from corruption. These issues can be mitigated and consequently this is a recommended option for your network. It allows you to be able to monitor and block DNS requests to prevent ads and malicious domains from being accessed. The Pi-Hole also allows you to take back control of your network. For these reasons I would definitely recommend the Pi-Hole.
